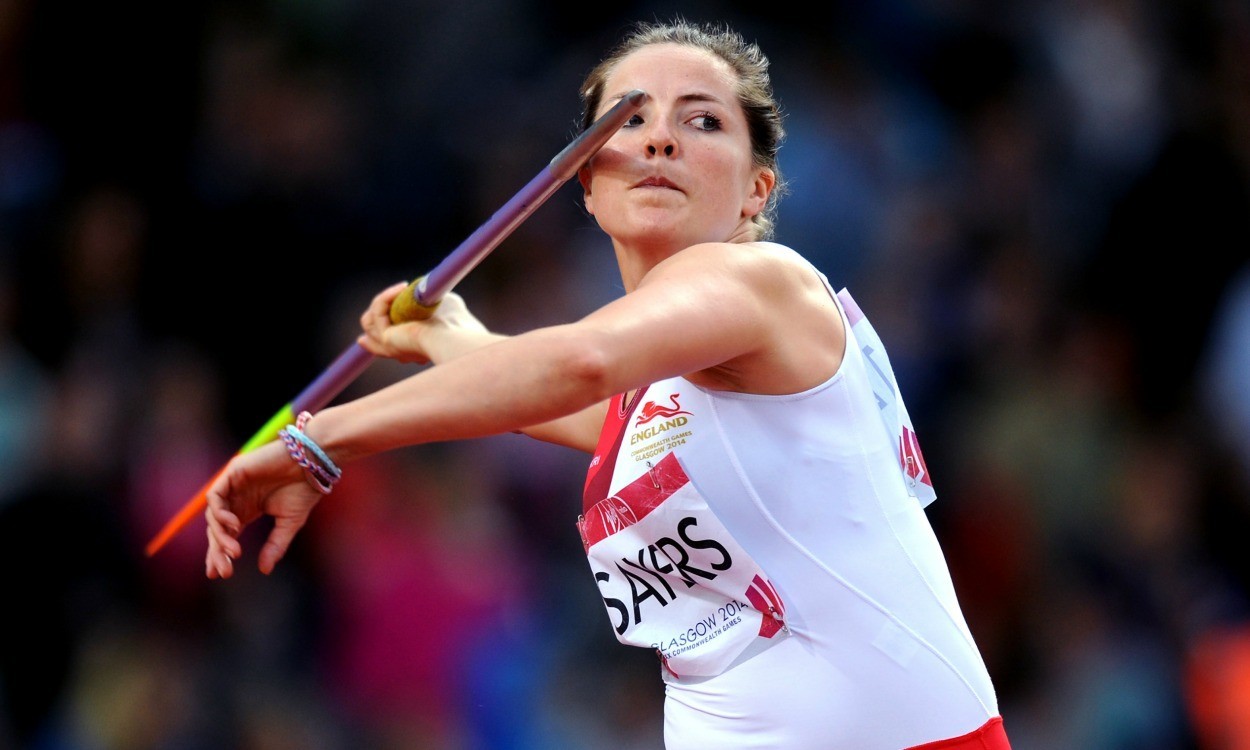
In the first of a two-part series, British record-holder Goldie Sayers runs through javelin technique basics
It is very easy to over-complicate javelin throwing. This is mainly because it is such a complex sequence of movements that have to occur in order, and at speed.
In order to try and keep things simple, I am going to highlight the key fundamentals of throwing a javelin a long way that every athlete would do well to remember from time to time.
Fundamental No.1: Acceleration
Athletes forget that acceleration is a skill. It needs to be trained. The fastest part of the run-up has to be at the delivery end of the throw, not at the start of the run-up. To do this, start slowly and accelerate.
So, follow these rules:
» Practise the skill of acceleration in your running and sprinting training. You must be able to tolerate the speed you create on the run-up and perform a sequential series of movements, so I would recommend starting slower and accelerating. Starting your run-up like a ‘bat out of hell’ only creates a rushed (and therefore shortened) throw if you cannot tolerate the acceleration when it matters.
» If your javelin is not going further as your run-up increases in length, then either shorten your run-up or really work on a controlled acceleration. This can only occur by starting slower than you think.
Remember: As javelin throwers, the reason we sprint and learn correct running mechanics is so that running at around 80% pace on the runway becomes effortless. We can then also accelerate. As you stand at the back of the run-up, I challenge you to start as slowly as you can.
Fundamental No.2: Withdrawal
The withdrawal is just that – taking the javelin back. Two words for this change from forwards to sideways running: smooth and gradual. Any rushed and jerky movements will take you off balance and make you look like you are fighting yourself down the run-up. So, slow down the withdrawal (in the upper body) and see how much easier it is to gradually accelerate on the run-up:
» Be aware that the start of the withdrawal should occur in conjunction with the opposite foot. For a right-handed javelin thrower, the withdrawal should start from the left foot. Just think of a forehand in tennis – opposite hand to lead foot. This way your back doesn’t endure too much torsion and the legs are free to move efficiently.
» Try not to bring the left foot across to the right side your body as you turn sideways. Blocking your body/right leg with your left foot across you in your cross-overs causes you to veer off to the right in the run-up. It also makes it hard to get your right foot past your left in your cross-overs and almost impossible to move in a straight line.
» I always used to think about the run-up and withdrawal as running down a narrow corridor. Keep the left arm parallel to the ground (like the javelin) and working in conjunction with the legs i.e. moving over a horizontal, not vertical plane.
Remember: No wasted movements = no wasted forced = good health = long throws
Fundamental No.3: Impulse
The impulse or ‘time in the air’ from the penultimate left foot contact (if right-handed) is imperative to the throw as it allows time for the legs to get back in front of the thrower in the final crossover and therefore helps set up the correct body angle for the throw. If, as a thrower, you feel like your delivery is rushed and not a ‘pull’ but rather a ‘push’, it could well be to do with the fact that you have not created a big enough impulse stride.
» The impulse allows for full extension of the lateral left hip and therefore creates a ‘sling shot’ effect with the left leg getting back ahead of the thrower in time for the left leg block. Note that an active right foot has a big job to do in this, too. However, if the impulse and left leg extension is not big enough then it is likely that the athlete’s right foot will land behind their centre of mass and their legs will barely play any part in the throw at all.
» The rhythm of the final three strides in effect is LONG (left), QUICK (right), BLOCK left).
» A very important point to note is that the impulse/time in the air should be created horizontally not vertically. What goes up must come down so travelling up too high in the impulse means more force to absorb with the right leg (on landing) and a slower right to left foot block contact time.
Remember: If in doubt and you’re timing is out, drive off your penultimate left foot contact and turn a push into a pull.
Fundamental No.4: Throwing position
The throwing or power position is critical. This is the point at which the body creates a bow for the arrow (the javelin). By contrast, in the pole vault the body is the arrow and the pole is the bow. The throwing position also enables the javelin ‘pull.’
» In order to get into the ‘inverted C’ position, it is important for your right foot to turn quickly when it lands to move into a fixed left leg block.
» It is imperative that there has been full extension off the left leg in the impulse stride which enables the legs to get ahead of your centre of mass in the air so you then have your legs out in front of you when you land. You then have something to pull the javelin against.
» The quickly-turned right foot into left leg block gets the hip ahead of the hand (which you can completely leave alone until the rest of the body has done its work) which not only creates the inverted C shape but also the height of release and mid flight in the throw. In all striking sports and throwing events, the power is generated from the hip.
» If you have done all these things in the correct sequence then you will find that your right hand is behind your right foot as your left foot lands creating length, pull and distance. Thoracic mobility is also important to really gain excellent range of movement in the throwing position.
» From my experience, to get from the right to the left foot quickly (something most javelin throwers struggle with) I would recommend thinking of the right foot as weightless as this will enable the heel to whip out and the hip to turn in. As soon as you think of forcing the right knee/hip in, you will have loaded the quad up and invariably slowed the movement down. However, everyone has their own preferences. If your own is working and you’re not sinking when you land on your right foot then stick with it.
Remember: Enable your body to get into a powerful position first and enjoy using the torque you will create with your whole body to produce a catapult-like effect for the javelin.
» Goldie Sayers is available as a mentor to coaches and athletes at javelinchamp.com where she offers a video analysis service. Follow her on Twitter @JavelinChamp1. Part two in this series on ‘the final stages of the throw’ can be found here


